Archive for Audio – Page 2

Studio Update May 20, 2011

Apart from mixing and editing at my studio in Santa Monica, I’ve been quite busy doing live television broadcast mixing for DIRECTV at their Los Angeles Broadcast Center. Mostly sports related shows, with some VERY early call times. I also recently finished the 5.1 mix of the 2010 Farm Aid show for broadcast.

I’ve also just finished working with Earth, Wind & Fire on a number of new studio tracks. We’ve been out at NRG and Glenwood Place studios in Burbank. Last fall I recorded them at the Hollywood Bowl with the Hollywood Bowl Orchestra. I am editing the video now and completing the 5.1 mixing for a DVD release later this year.

In April I spent a few days at the NAB show and attended the Apple event on Tuesday night that revealed Final Cut Pro X. It’s a complete rewrite of the application and looks to be quite impressive although many, many questions remain. It’s due to be released in June via the App Store.

The core new features of FCP X are:

  • 64-bit Processing (FCP is no longer constrained to 4GB of RAM)
  • Grand Central Dispatch – it will use all the processors in your MacPro
  • GPU Rendering
  • Color Management integrated with ColorSync

Along with my years of working in pro-audio, I enjoy video editing.  Like working with music and audio post-production, editing video requires a balance of technical skills along with creative innovation.
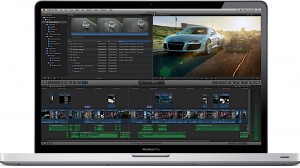
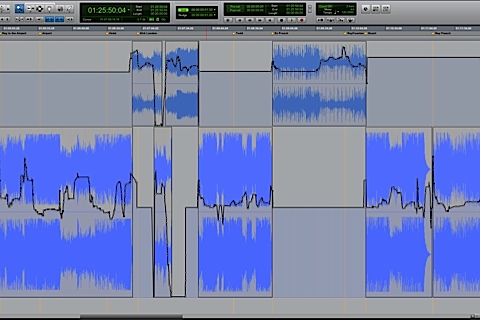
 

Image courtesy Apple Inc.


Studio Update

Apart from mixing and editing at my studio in Santa Monica, I’ve been quite busy doing live television broadcast mixing for DIRECTV at their Los Angeles Broadcast Center. Mostly sports related shows, with some VERY early call times. I also recently finished the 5.1 mix of the 2010 Farm Aid show for broadcast.

I’ve also just finished working with Earth, Wind & Fire on a number of new studio tracks. We’ve been out at NRG and Glenwood Place studios in Burbank. Last fall I recorded them at the Hollywood Bowl with the Hollywood Bowl Orchestra. I am editing the video now and completing the 5.1 mixing for a DVD release later this year.

In April I spent a few days at the NAB show and attended the Apple event on Tuesday night that revealed Final Cut Pro X. It’s a complete rewrite of the application and looks to be quite impressive although many, many questions remain. It’s due to be released in June via the App Store.

The core new features of FCP X are:

  • 64-bit Processing (FCP is no longer constrained to 4GB of RAM)
  • Grand Central Dispatch – it will use all the processors in your MacPro
  • GPU Rendering
  • Color Management integrated with ColorSync

Along with my years of working in pro-audio, I enjoy video editing.  Like working with music and audio post-production, editing video requires a balance of technical skills along with creative innovation.
Dialog and the Lead Vocal

I recently got a new gig mixing a half-hour TV show on a major cable network. I’ve done three shows so far and the client really likes the way things are sounding. They also seem to be really great people to work for. The production quality of the show is superb which is always inspiration for a great mix. There is a lot of music in the show and they wanted it mixed pretty aggressively. Man, they found the right guy for that! The show is also pretty dense at times with dialog, SFX and music all competing to be heard. But no problem, I’m good at clearing a space or notching out an area for the dialog in productions like this. I constantly use techniques I’ve learned mixing music.

I’ve spent over 30 years making records in the studio. I’ve worked with countless bands and singers. Probably one of the most important things in the music mix is the placement, clarity and overall feel of the lead vocal. It has to sit just right — it has to feel just right. I tend to use quite a bit of dynamic and EQ processing along with extensive automation moves to achieve this. Of course all of this depends on the type of music. If it’s a really driving and dense track, it takes more work to get the vocal in the pocket.

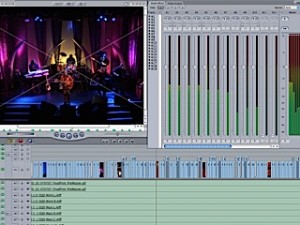
When working on a TV show mix such as this I treat the dialog just like the lead vocal in a music mix. Quite a bit of processing and quite a bit of automation rides in ProTools. I also really work the music tracks the same way — with compression, EQ and A LOT of automation rides. Here’s a timeline of the music tracks for a recent show I did, and you can see the amount of automation moves there are. I’m also automating the EQ for each track. Rarely does anything remain static. To give the show dynamics, emotional impact and clarity you must spend time riding that fader!

ProTools Music Track Automation

When I first started doing more post-production work I felt somewhat intimidated because I had been a ‘music guy’ for so many years. I felt there were audio techniques and skills that were used in working on TV and film that I didn’t know. But I quickly learned otherwise. What I discovered first off was that most post-production editors, sound designers and mixers came from the music industry! I also quickly understood that the expertise I had acquired recording and mixing bands for all those years could be used in post-production mixing. In fact, it was an advantage to have that experience. I’ve since had clients say to me that they preferred someone with my music industry background mixing their TV show.

So for me, and the way I work, there really is no difference between the dialog and the lead vocal.

Sound and Picture

https://vimeo.com/paulklingberg/jbutler-afrika

Something New

Imagine this… you’re a successful audio recording engineer and you have been given the opportunity to not only mix the music for a live concert, but edit the video also. Would you take the job? I had this situation come up, and I jumped on it. I’ve recorded and mixed many albums for Jonathan Butler over the years and consider him to be one of the most prolific musicians I have ever met. It’s always such a great experience to work on one of his records. A while back his record company wanted to record and videotape a live concert from Jonathan’s homeland, Cape Town, South Africa for a DVD/CD release. Jonathan performed with his top-notch touring band and his daughter, Jodie Butler, who sang background vocals.

It was a natural for me to handle the music mixing for the project, but I convinced his management and record company to let me edit the picture also. Along with creating a compelling concert edit, the goal was to include some bonus material on the DVD telling the story of Jonathan’s journey from growing up in poverty in the apartheid era of South Africa, to internationally acclaimed recording artist. The camera crew was fantastic as they not only captured the concert with six HD cameras, but shot a lot of footage from where Jonathan grew up, interviews with people he knew from his old neighborhood and some very emotional scenes of him visiting the Robben Island Museum in Cape Town which honors Nelson Mandela and the political prisoners of the apartheid era.

As a veteran music recording engineer, I’ve always thought about editing picture. I’ve had some experience with AVID Media Composer years ago and more recently with Final Cut Pro, but there was no question my proficiency level as an editor would have to be raised. I knew deep inside I could do it because I’ve always felt that editing video is an extension of the art of mixing music.

For a period of time prior to this, I was involved with a production facility that produced DVD-Video and DVD-Audio (remember that format?) discs. Working with them exposed me to professional digital video editing techniques and general post-production workflow. I started attending the Los Angeles Final Cut Pro Users Group, which was and still is an invaluable resource. Their monthly meetings are an absolute essential to anyone involved in the Final Cut world. With my experience and background, I really felt that I could extend my skills and talents in not only creating a great sound mix for the project, but a captivating visual presentation as well.

Jonathan Butler Live In South Africa Concert Video Edit and 5.1 Audio Mix

The Balance Beam

It’s a classic left-brain, right-brain project. Time devoted to technical issues, time devoted to the creative. It’s always a balance, juggling the two. How do I use the tools and technique I have available to create something that will invoke a feeling in the viewer or listener? For this project and my role as video editor, it was as much about learning the tools as using them.

I started the project by taking the plunge and purchasing Final Cut Pro Studio and installing it on a new 3Ghz Dual Core Mac Pro. I wanted my video editing system to be completely separate from my audio workstation, so I rearranged my studio a bit and put the video system to left of my ProTools setup to create an ‘L’ shape. Doing it this way kept my imaging for stereo mixing as well as 5.1 completely intact when mixing in ProTools. I must say I love working like this. I can be rendering or working on something in FCP and just swing my chair around to work in ProTools. I also like having my traditional office desk on the right side, which creates a very workable, full ‘U’ shape in my room. I’ve always been inspired by the design of this famous studio.

Early on in the project, I came in one morning to see that the new Mac Pro had an ugly crash on an overnight render. It needed a new motherboard. About a month later I needed to replace the ATI Radeon X1900 XT graphics card and a 17″ Apple Cinema Display. I’ve had so many Apple products that I know sometimes you’ll get a Mac that will give you no trouble for years and years, other times you get one that requires some of the central components to be replaced (usually the motherboard) before it works reliably.

Jonathan Butler Live In South Africa Concert Video Edit and 5.1 Audio Mix

Workflow

The video capture format. Since this was shot in South Africa and they are a PAL country, all the video was shot at 1080i/25fps. The final delivery requirement was to create an NTSC DVD. The video format was HDV except for the jib camera, which was shot standard def (ugh!). I think the camera crew thought I would be down-converting the HDV format to standard definition, so the mixed media would not matter. I thought differently and wanted to keep the HD format for as long as possible in the production workflow even though the final delivery would be DVD-V. I just felt working as close to the native codec as possible would give me the best quality and most options in the long run. I elected to up convert the SD camera’s footage to HD using Compressor with some very long renders. I really learned that every time you transcode video you potentially take a quality hit.

HDV is an extremely lossy, long-GOP, Non-Intra-Frame, MPEG-2 codec which is the same codec used in DVD-V. Basically the compression works like this — much of what you see on-screen is a calculation. Frames are calculated based upon frames that came before and after. It works quite well and is a brilliant engineering solution to smaller physical disk sizes, lower data rates and faster throughputs. It has drawbacks in that the quality is not as good as other HD formats. All high-definition video formats are not the same! HDV also requires a fairly fast computer because when you place your cursor on a frame in the timeline it has to process and calculate the content of that frame. Currently, FCP will work with HDV just fine in the timeline, but the overhead is pretty extreme once you start working in multiclip mode (essential for editing music concerts with multiple camera angles). Also, since MPEG-2 is a long-GOP format, timecode editing is less than accurate. Since I would be syncing six camera streams, staying in native HDV was not an option.

If I was doing this project today, the first thing I would do is convert my captured HDV video to the newer ProRes format. But since ProRes was not available back when I did this project, I went with another Apple codec.

The video editing format. I elected to convert all my video footage to the Apple Intermediate Codec (AIC) for editing. Again, this would not be my choice today, but at the time it was my best option. AIC was primarily designed to be used in the HDV workflow before FCP could edit HDV natively. It’s designed to be an intermediate codec, a production format not a delivery format. It works natively in FCP, is full-raster and has a reasonably low data rate. I rented a Sony HVR-M25 and used the capture preset that included transcoding to AIC. At this point I also created a database in Filemaker Pro that helped me organize, name and rate my footage.

The music recording format. The audio was recorded in ProTools at 48k, 24bit, BWAV at standard PAL frame rate of 25fps. Again, no conversion of the audio format captured frame rate, I stayed at 25fps to match my FCP editing timeline. Once I decided that I would work in the 25fps format for the editing vs. 29.97fps, the overall process and workflow became clear. I would create the edit and mix at 25fps and then at the very end convert that to an NTSC DVD. This, as opposed to converting all my footage to NTSC right from the start. This would have taken way too much to time to convert, either with a software or hardware solution.

This is the workflow I developed and implemented:

  • Capture and convert all the footage from HDV to AIC, 16×9, 1440×1080, 25fps
  • Edit in FCP, AIC sequence, 16×9, 1440×1080, 25fps
  • Create stereo and 5.1 music mixes in ProTools, 48k, 24bit, BWAV, 25fps
  • Send the audio mixes to Future Disc for mastering
  • Import and conform the eight tracks of mastered audio (5.1 & stereo) into my edited sequence in FCP
  • Export the entire final edited sequence, including all eight audio tracks, as a self-contained QuickTime file, 25fps, 16×9, 1440×1080
  • Import that QuickTime file back into an NTSC sequence
  • Apply the Nattress Standards plug-in to convert to NTSC (29.97) and render (about a 9 hour render for the 90 plus minute show)
  • Export to a self-contained QuickTime file, NTSC, 29.97fps
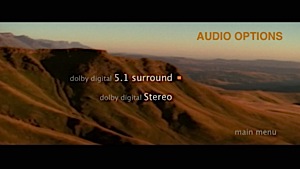
  • Use Compressor to create MPEG-2 and AC3 files (NTSC)
  • Graphics, titles and lower-thirds created in Photoshop and LiveType (720×480)
  • Use DVD Studio Pro to create an NTSC DLT Tape for DVD replication

Here’s a complete list of the software tools I used:

  • Final Cut Pro
  • Nattress Standards Conversion plug-in for FCP
  • Digidesign/AVID ProTools HD
  • Compressor
  • LiveType
  • DVD Studio Pro
  • Photoshop CS3
  • Motion
  • Filemaker Pro
  • Text Wrangler

Jonathan Butler Live In South Africa Concert Video Edit and 5.1 Audio Mix

Millions and Millions

Numbers. Lot’s of them. Millions and millions of 0’s and 1’s magnetically recorded on hard drives I’ve assigned for this project. All these little bits of information create thousands of moving images displayed on my monitor and sound waves that journey from the speakers to my ears. It’s my job to give those sounds and pictures substance — to tell the story of this concert event and the life of Jonathan Butler. I had the confidence I could do this and most importantly Jonathan and his record company had complete trust and faith in me.

So you’re the video editor and the music mixer. Where do you start first? The picture or the music? I start with the picture. The venerable rough cut and start whittling it down from there. Take a little out here, add a little there. Frame by frame the concert starts to shape up. A drawback of the capture/transcode process into FCP is that the original timecode stamps go away. There was an audio mix recorded to each of the cameras so I use that for my sync source for the six cameras in multiclip mode.

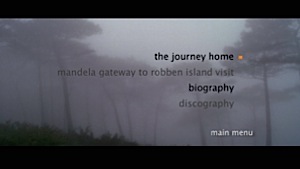
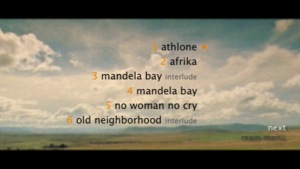
Every couple of weeks or so Jonathan, his management and the record company folks come by to check on the progress of things. Everyone is excited and happy with what I’ve been doing. We work through the usual creative decisions and options to make, but most importantly everyone is on the same page as far as the overall look and feel of the project. Fortunately, I was given enough time to work this project through. The concert was recorded in the fall, so a release date was not set until spring of the next year. As the weeks went by we had much discussion as to what the various bonus segments would be and how to shape and weave them into the overall presentation. Jonathan added a few lines of narration to introduce some of these segments. These added lines were essential to telling the story of Jonathan growing up in South Africa and the beginnings of his musical career. My final edit included sixteen songs interspersed with a number of little vignettes about Jonathan. For the bonus segments on the DVD we included the following features:

  • The Journey Home
  • Mandela Gateway to Robben Island Visit
  • Biography
  • Discography

Jonathan Butler Live In South Africa Concert Video Edit and 5.1 Audio Mix

As the picture cut is getting closer, I start to work on mixing the music. We do a few of the normal vocal fixes and embellishments for a live concert recording, but nothing more than an hour or so of work. I always start music concert mixes that need to be in 5.1 surround and stereo, in stereo first. After I’ve achieved a solid stereo mix, I’ll start spreading things around in the surround field. I’ve done a lot of surround concert mixing and I feel doing it this way tends to give the 5.1 mix all the punch and impact that the stereo has. As the final mixes are completed, I FTP them to Steve Hall at Future Disc for mastering.

I’ve since learned Color (FCP Studio software), but at the time I really did no overall or proper color correction to the show. I adjusted a few individual clips using the 3-way color corrector in FCP, but in general there was no color grading applied. Subsequently we used the footage to put together an hour show for BET, which I did color correct and made sure none of my video levels were clipped by adding the Broadcast Safe plug-in.

Once I had my final mastered audio conformed to my final picture edit, I exported the entire timeline to a QuickTime self-contained file. This QuickTime had eight channels of 48k 24bit WAV audio, 5.1 surround and stereo mixes. Since that timeline was at 25fps, next I needed to convert to NTSC. This is where I used the Nattress Standards Conversion plugin’s for FCP. It required a long overnight render, but it worked absolutely brilliantly. I was able to do all my capture and editing at 25fps and then output my final show at 29.97fps.

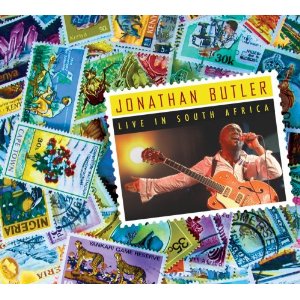
Once I had the NTSC QuickTime, I went through the process of authoring the DVD. I used DVD Studio Pro and Compressor for this. I worked with graphic artist Kevin Reagan who did an awesome job designing the artwork for the jacket and cover. I gave him some 1920×1080 screenshots of the concert and he incorporated them into a beautiful montage of postage stamps from various African nations.

Jonathan Butler Live In South Africa Concert Video Edit and 5.1 Audio Mix

New Opportunities

I am proud of my creative and technical achievement on this project, for Jonathan’s musical brilliance and for all of the management team working together to release Jonathan Butler /Live in South Africa. Like most projects, there were times when I stumbled on some technical issues, but in the end it helped me to stretch further and learn more. Along with immersing myself in many articles about FCP video editing techniques, I also read a number of books. One was “Behind the Seen: How Walter Murch Edited Cold Mountain Using Apple’s Final Cut Pro and What This Means for Cinema.” Walter is the only person to ever win an Oscar for both sound mixing and film editing on the same film (The English Patient). It is a very inspiring book for working on any audio-visual project, but particularly mine since I was editing picture and mixing sound.

What did I learn? Was it worth taking the jump and pushing myself to work in a role that was very different from what I normally do? Absolutely. My understanding of video and video post production has made me a better, more versatile and marketable audio recording and mix engineer. Having skills as both an editor and mixer is essential to the professional industry I work in daily. I’ve since been involved with a number of other video editing projects and I’ll continue to seek out new opportunities to use my skill and creativity in sound mixing and video editing.

Resources

Along the way, I found these websites to be essential resources for my continued education in digital media, specifically video editing.